We will be working primarily with
water-based colored pencils. I will be using Crayola watercolor pencils, but you’re more than welcome to use any water-based colored pencils (e.g., Caran d'Ache, Faber-Castell, etc.). Here’s a
link to Blick’s selection. Generally, the base set will be 12 colors. You will need the 10 minus the black and the white.
For
watercolor paper, what you have will work! Having said that, in general, the watercolor paper choice is the single most impactful choice you can make as far as the quality of the finished piece. My preference personally would be
hot-press watercolor paperor
Bristol paper(which is not watercolor paper, but works well given its smoothness). It is easier to find cold press watercolor paper, and that will work. The hot press has a smoother surface, and that’s what I usually choose for scientific illustration because the smoother surface, the more detail it will accept. Weight is also an important factor. The heavier the weight, the more the paper can withstand without buckling or damage. I will likely be using 300-pound, hot press watercolor paper this weekend.
For your water, a glass or cup of water will suffice. Also, have a rag or paper towel to clean your brush.
For brushes, you can use any small brush (size 1 or 2, round). An affordable, readily available brush like Winsor & Newton Cotman Watercolor Brushes will work fine. The Winsor & Newton Series 7 Kolinsky Sable Brushes are my favorite, and they last (but they are significantly more expensive).
For tracing paper, any tracing paper or vellum will work.
In terms of pencils, it’s good to have at least one soft graphite pencil (B) and one hard graphite (F or H) for transferring the line drawing
For dissection trays, I noted on the Material’s List that you could purchase them online from a place like Carolina Biological (or even Amazon). I have a few purpose-built ones myself, but most of the ones I use for in-person classes are ones I made. To make your own, buy some paraffin wax. Gulf Wax Household Paraffin Wax is available at my grocery store, hardware store and places that sell canning goods. I use four 16 oz bars for one deep baking pan. It’s recommended to melt the wax using a double boiler method on the stove top and then pour it into the cake tray. Having said that, I usually do it in the oven given that I am lucky enough to have an oven that is very precise at low temps (120°F to 200°F). Regardless of how you melt the wax, then just set it on a level, heat resistant surface to cool. Please note, melting paraffin wax in the oven can be dangerous, so if you don’t have an oven with reliable low temp settings, stick to stove top or heat plate. Finally, if you don’t have/can’t make a dissection tray, a piece of foam and some pins will work, as we are simply pinning the fish and not doing an actual dissection.
For your
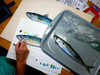
specimen, we will all be working with
formalin preserved perch for this workshop. Your specimen will be sent directly to you from Carolina Biological.
Finally, for pins, if you have Handi-Pins or another pin designed for dissection, that’s great. Otherwise, most any stout pin will work, including kitchen pins and even straight pins.
 Loading... Please wait...




 19-20 September, $120.00 (https://stores.karentalbotartonline.com/virtual-illustrating-fishes-workshop-history-and-techniques-2-day-8-hours/))